

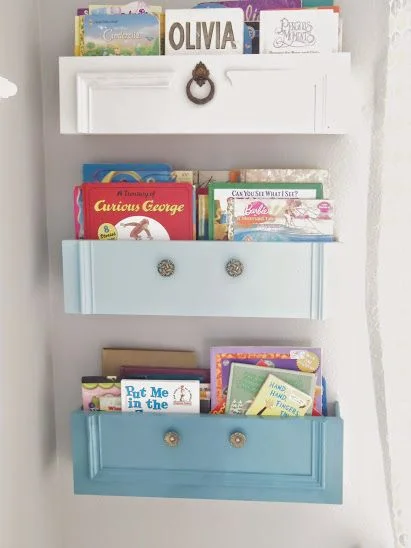
Sometimes you find a piece of furniture and it’s just beyond repair or even my upcycling skills but think twice before sending it all off to the dump. Old drawers can be upycled easily and one idea that I love is turning them into shelves.
Old Drawers are often really well made ( look out for the dovetail joins these are a winner) and are much more visually interesting than an average boring MDF box shelf on your wall. The creative possibilities are endless, they can be painted any colour to suit your interiors and you can always add a pop of colour to the back of them or use some stylish wallpaper to add some interest to your room. Check out a few ideas that inspired me.
Ref Hometalk

.
Ref Apartment Therapy.
I wanted to create some extra space to store my ever-growing, now slightly out of control house plant collection and although the chest of drawers I salvaged was a bit beyond repai the drawers were perfectly good. It was simple to do, it only took a few hours and cost pence. So here goes…
You need to Click on the links to take you to my Amazon Warriors on Waste Shop for my product recommendations.
Old Drawer - freecycle may have some?
A small piece of Wallpaper- an offcut or even wrapping paper could work too.
Here’s just how easy it is.
1) Firstly find yourself and old drawer.

2) Wipe the drawer down before you paint it, get rid of any dust or cobwebs and bits that may mess up your paintwork. Preparation is always key with these things and helps create a really professional finish. Once clean, choose your chalk paint colour and paint your drawer in your chosen colour. No need to paint the back as that will be where you are going to pop your wallpaper. I would suggest two coats so that you get a nice finish.

3) Once the paint has dried I sanded my drawer adding a bit of detail to the edges and giving a bit of an aged distressed look.
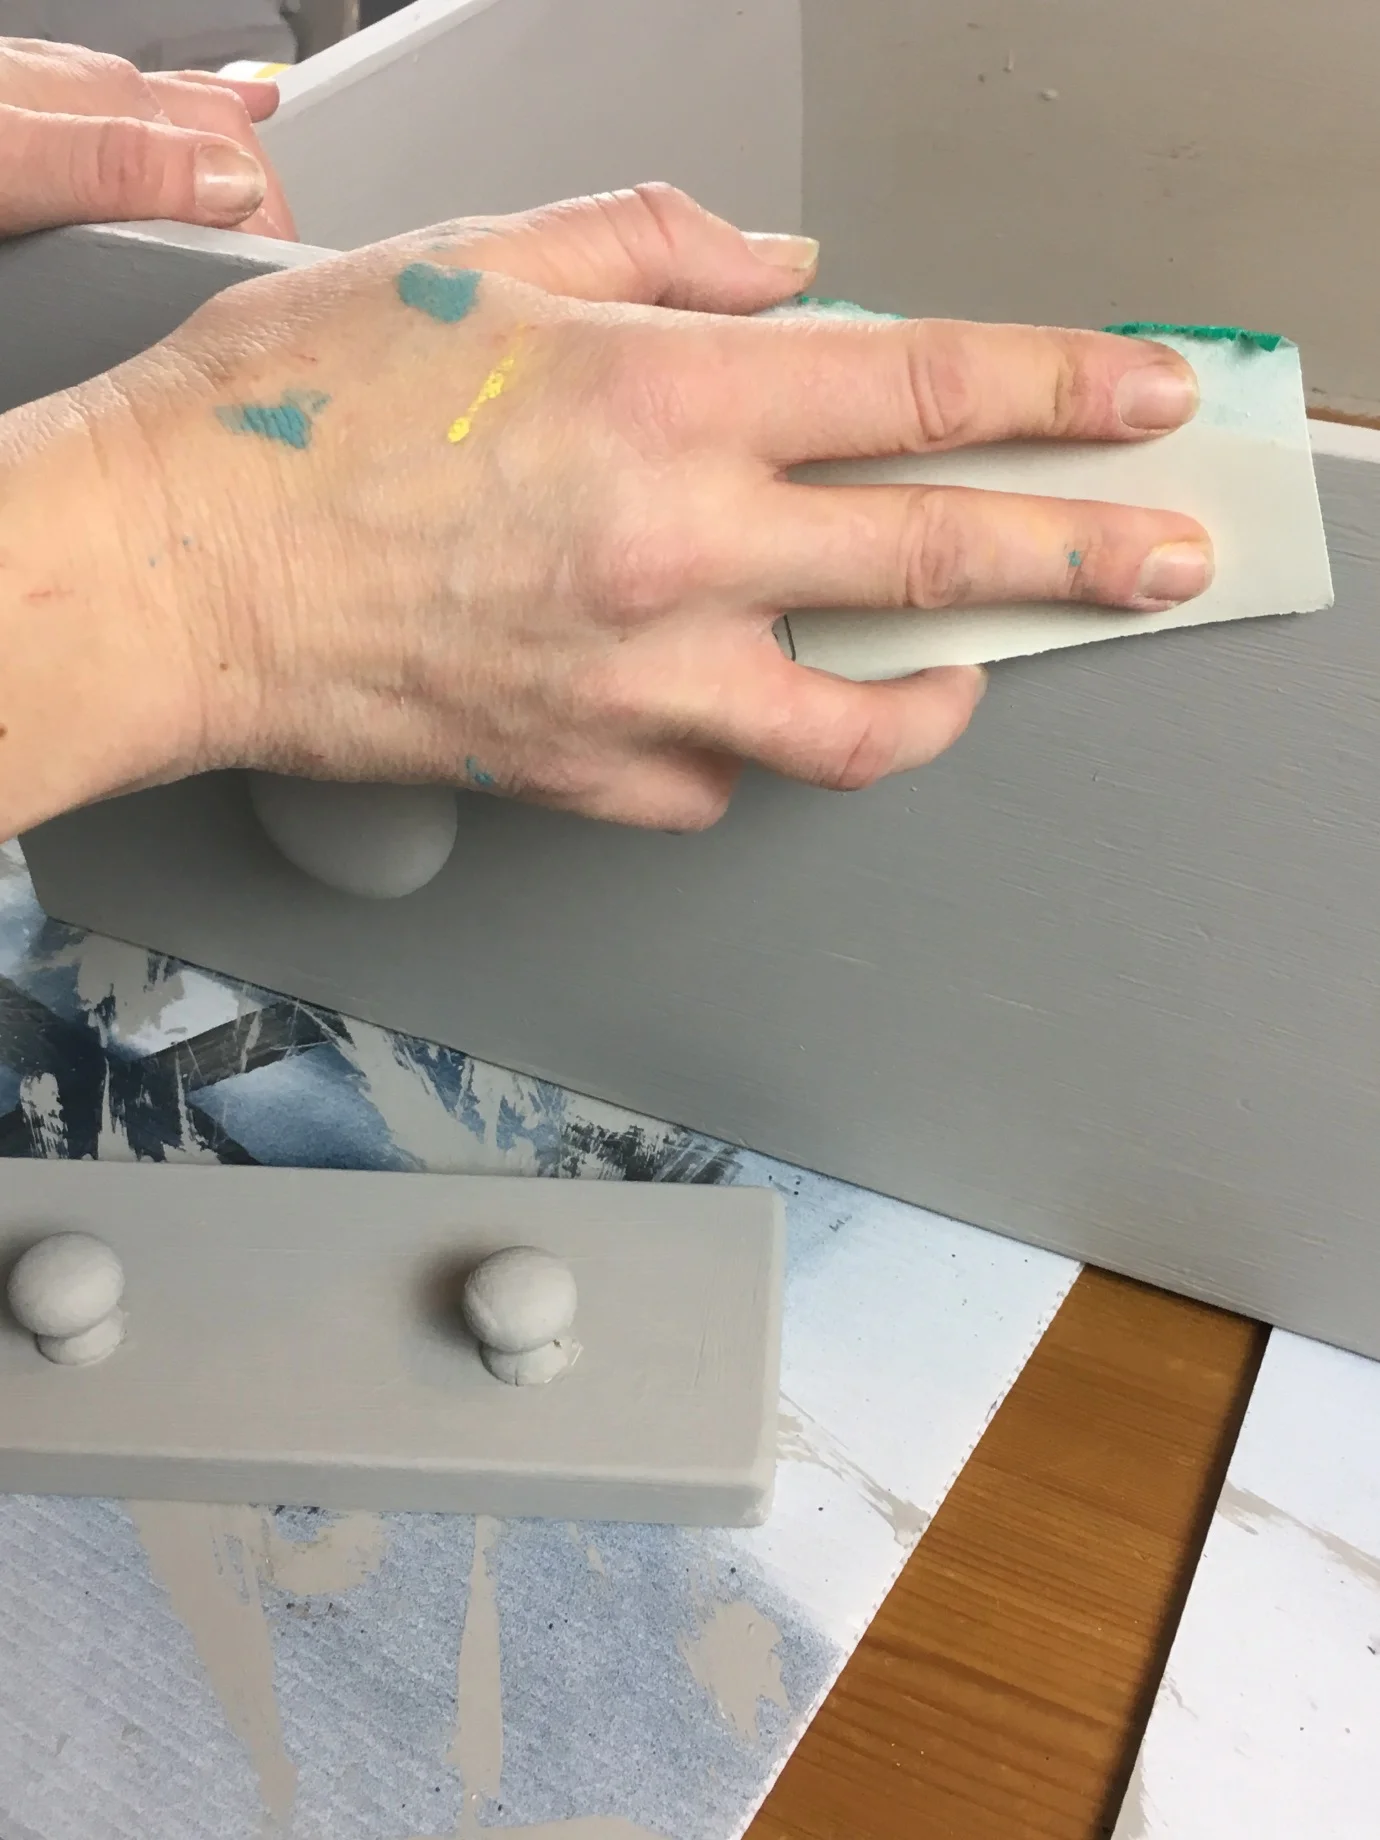
4) Then apply the furniture wax to seal the paint in and protect it. Just massage the wax in with an old cloth. The colour of the paint will darken very slightly but it will protect the drawer from any knocks, you don’t want all your hard work getting ruined.

5) Next, get your chosen piece of wallpaper or wrapping paper. Botanical prints are really fashionable at the moment and something with real impact works well. I chose a wonderful print from B&Q. The larger prints seem to have more impact as they can be seen from far away.

6) Mark around the drawer on the wallpaper and then cut out the piece of paper so that it will fit snugly into the back of the drawer-

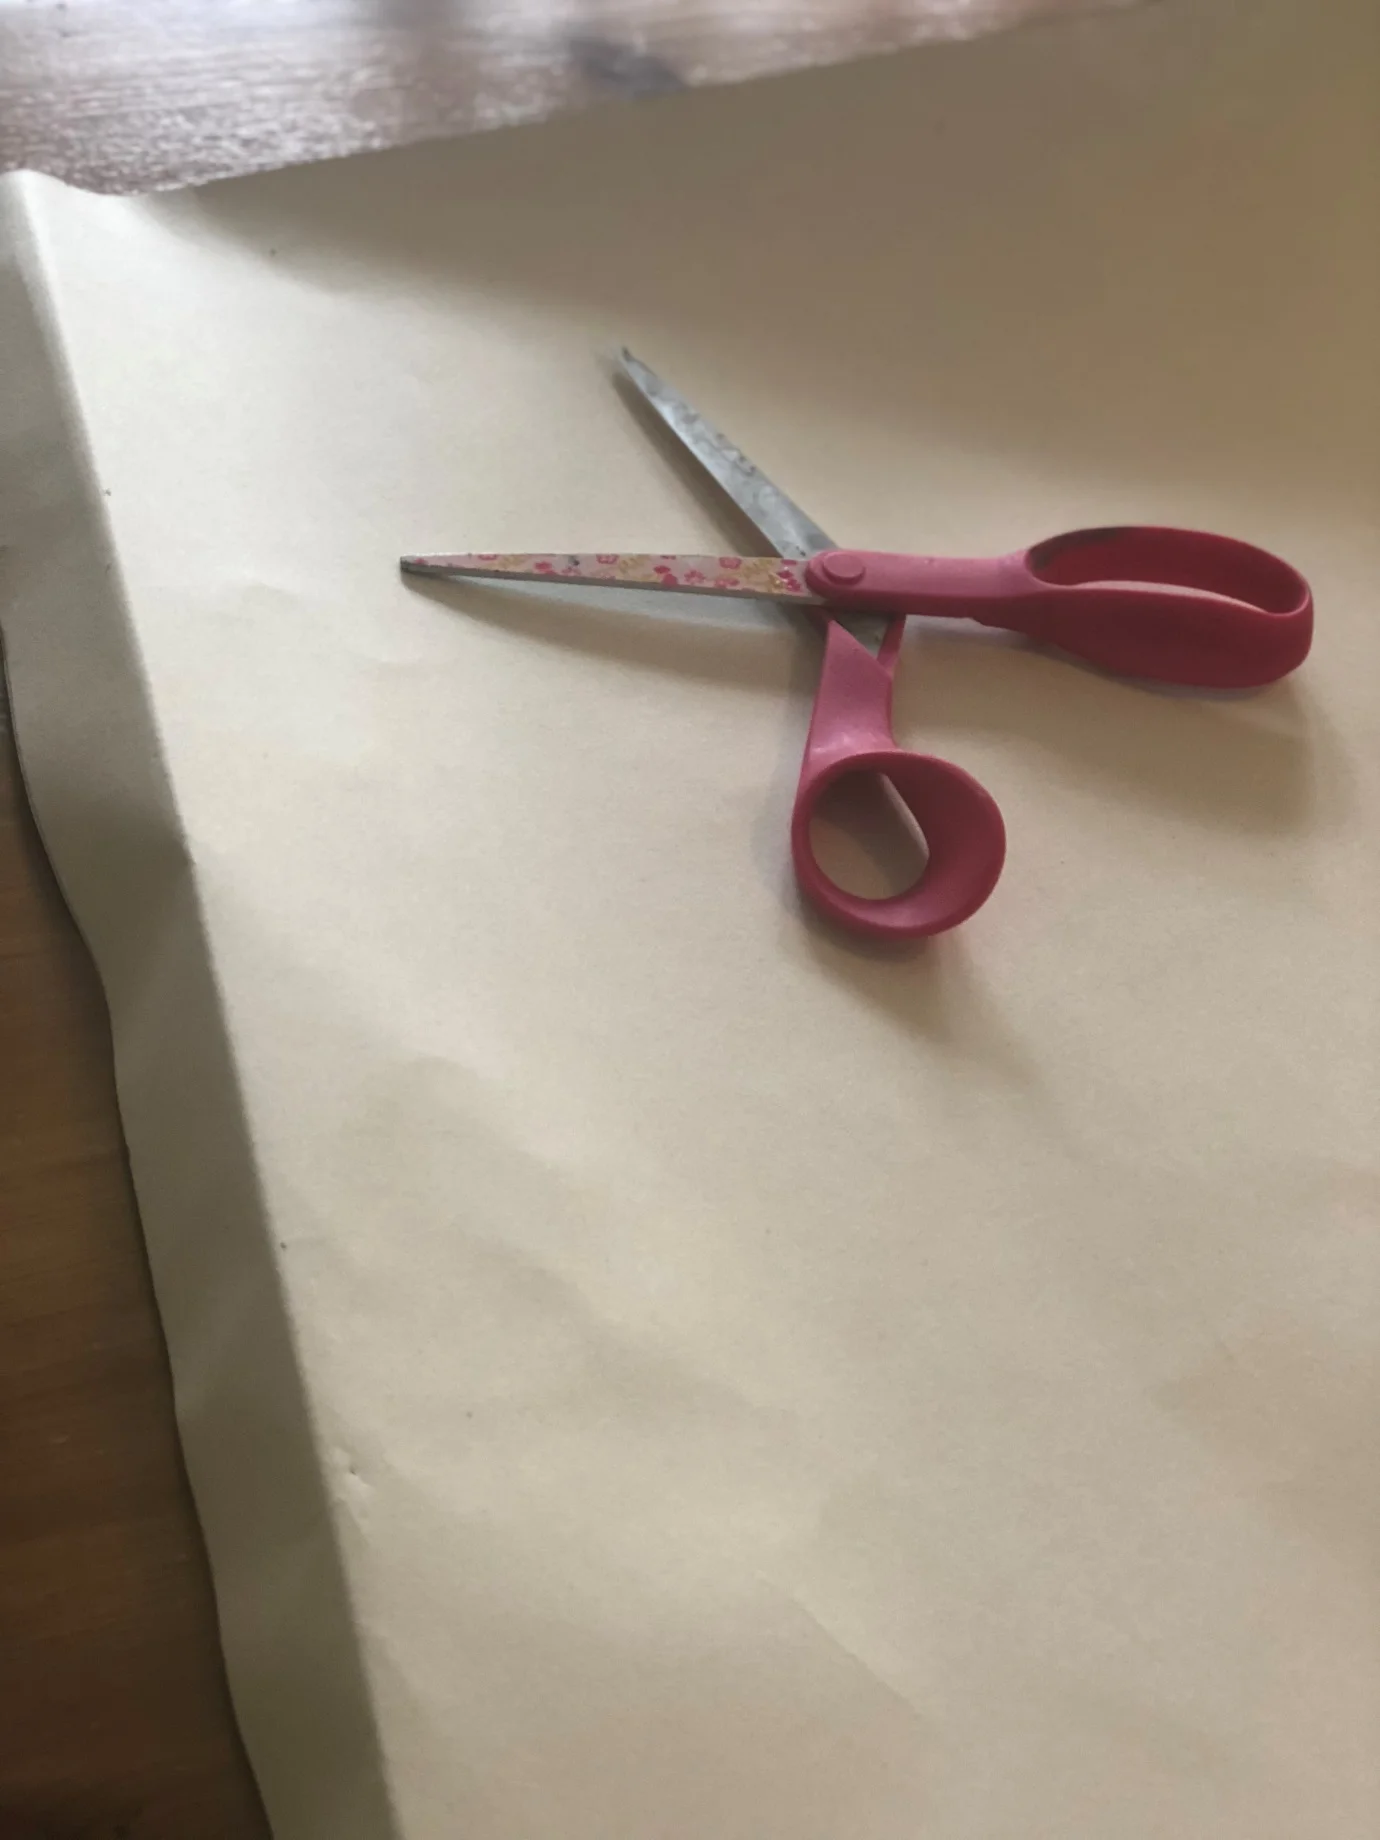
7) Once you have the shape that you need, use some sharp scissors and neatly cut the piece of paper. I used decoupage glue or modge podge glue to then stick the piece to the back of the drawer.Any glue or spray mount would do the job but I like the decoupage glue as it does not dry too fast and allows you to move the paper a bit like wallpaper paste until it is in the right place. Then leave it to dry. This is a good point to pop the kettle on!!!


8) You then need to attach the brackets to hang your shelf, this is an easy job. Pilot drill a small hole for the screw to go into on the back of the shelf and then screw the bracket on.
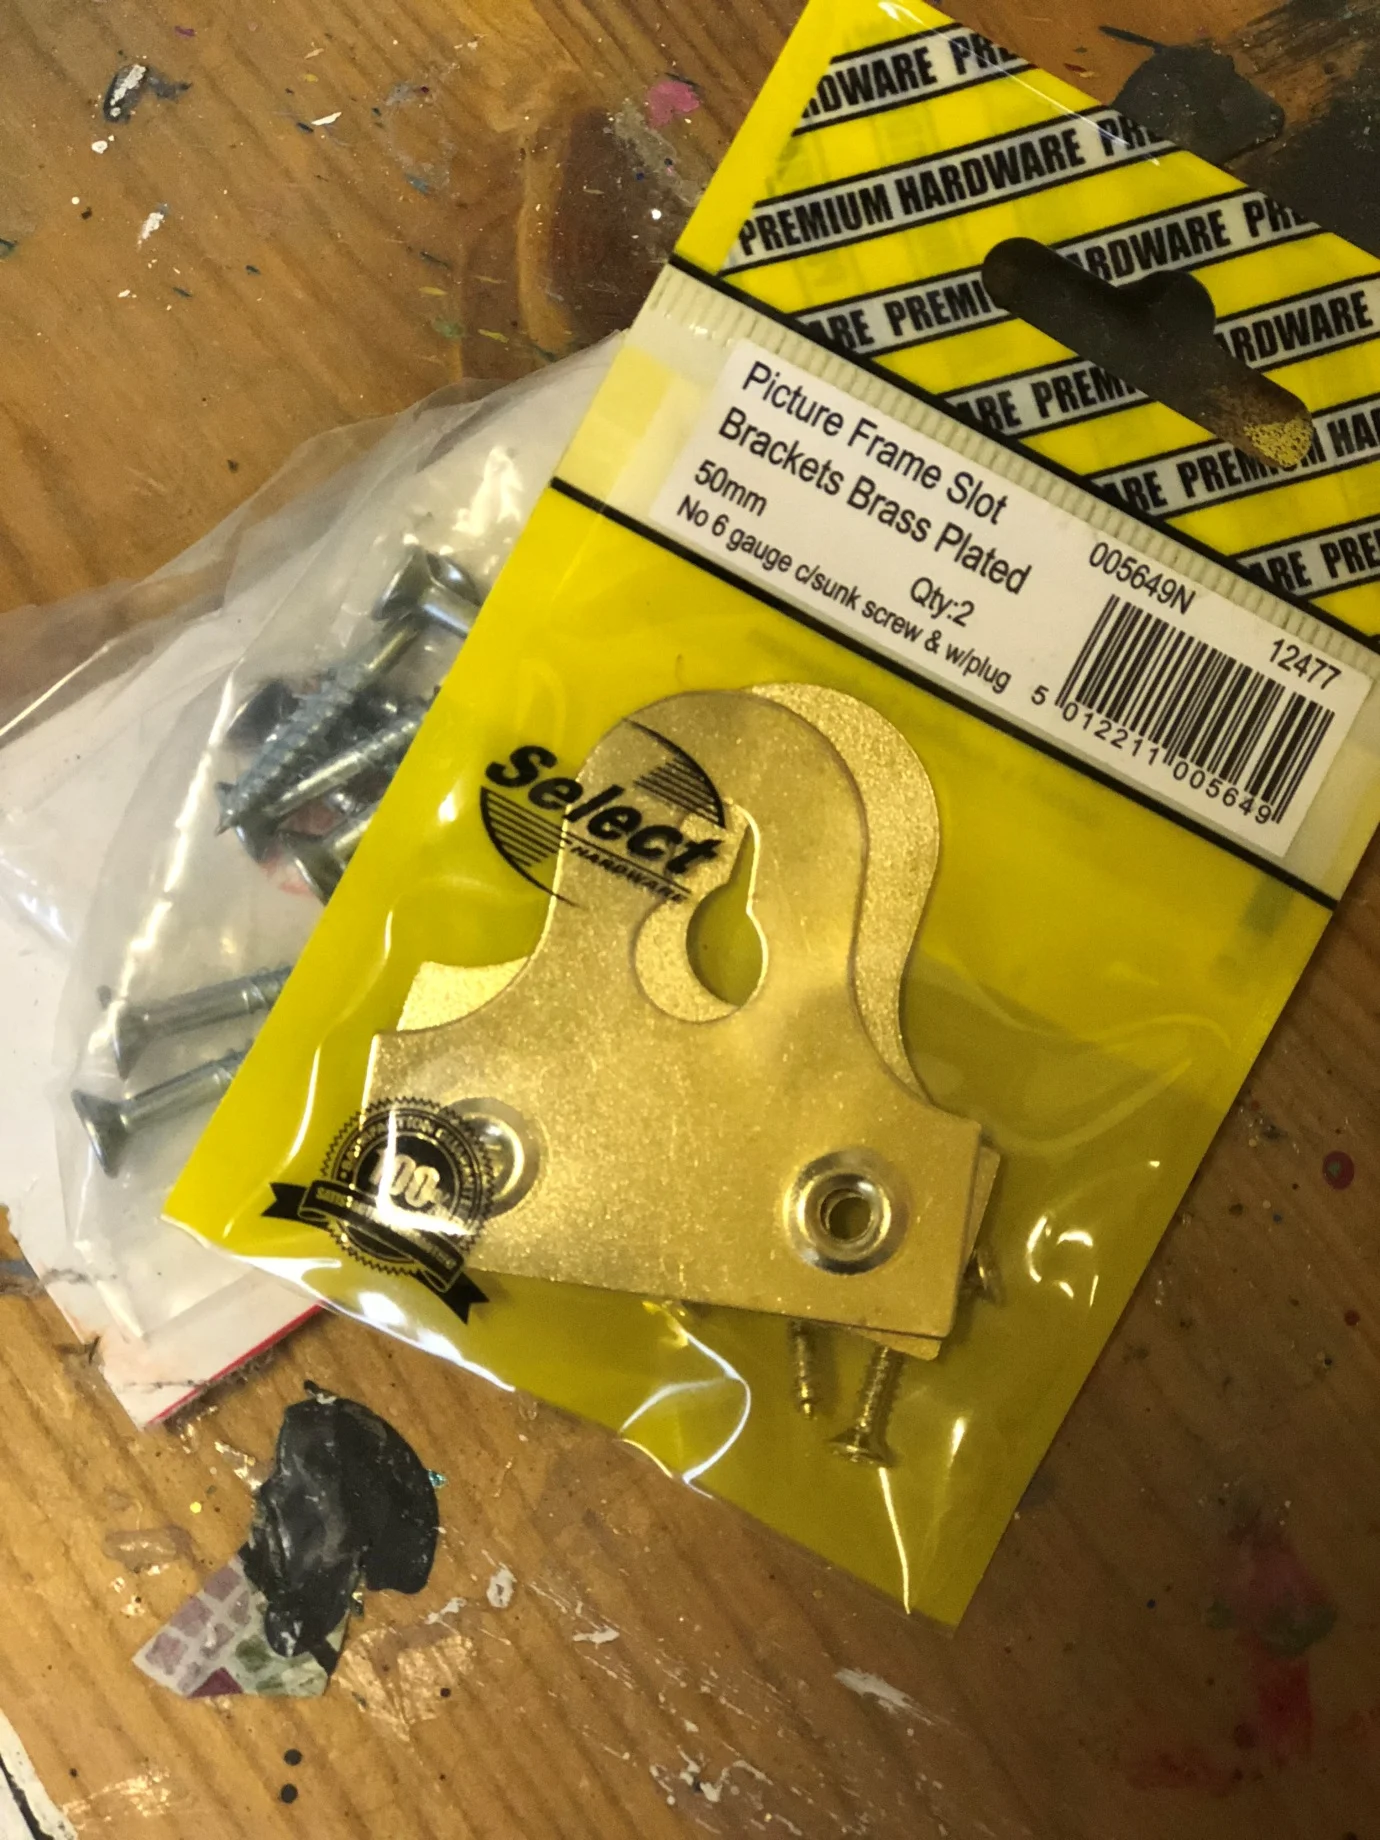


9) Once you have your hooks safely on, next drill two holes in the wall and you are good to go. It’s now time to style the shelf up.


Although my shelf is used for my ever growing selection of plants, these shelves could be used for anything, extra space for books, ornaments or to display trinkets. I just think that they add a really interesting feature to any wall and you could cluster several different drawers together on the wall and almost form a wall unit.
So there is a quick idea for you. It’s also a great easy make that children can get involved in too. One of the children on my Upcycling Bootcamp made this fantastic one, as she needed extra space to store her art supplies and slime ingredients.!!

Over to you folks, get creative!
Happy making.
Chat soon
Lynne